Finally—An HDR Workflow That Works
A Guide for Filmmakers, Content Creators, and Video Pros using ProCamera for iPhone, Lightroom, and Premiere Pro
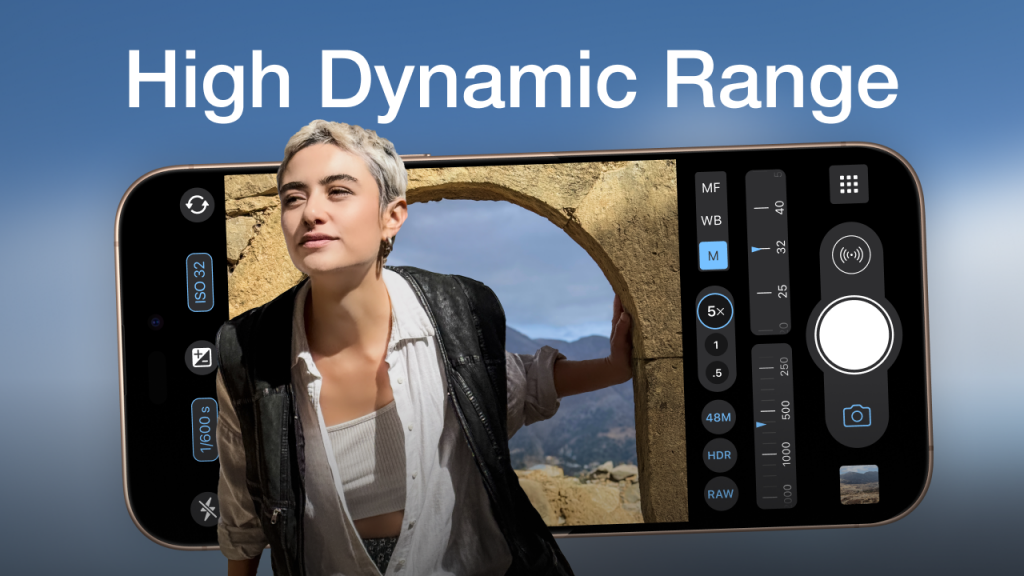
HDR (High Dynamic Range) photography and video can be incredibly rewarding, but also challenging to work with at times. While the payoff is huge, getting consistent results when working with HDR takes a dependable workflow. The good news? There is one, and we’re going to share it with you here! We’ll break down a reliable process for importing, editing, and exporting HDR photos and videos using ProCamera, Lightroom, and Premiere Pro. We’ve gone through the trial and error phase so you don’t have to. The concepts outlined below also apply if you’re using DaVinci Resolve, Final Cut Pro, or other video editing software.
HDR is still relatively new territory, and not everyone has an HDR-capable screen—so it’s understandable that this topic can feel a bit nebulous. As support for HDR continues to grow across devices and platforms, the workflow will likely become more streamlined in the near future.
Capturing HDR Video with ProCamera
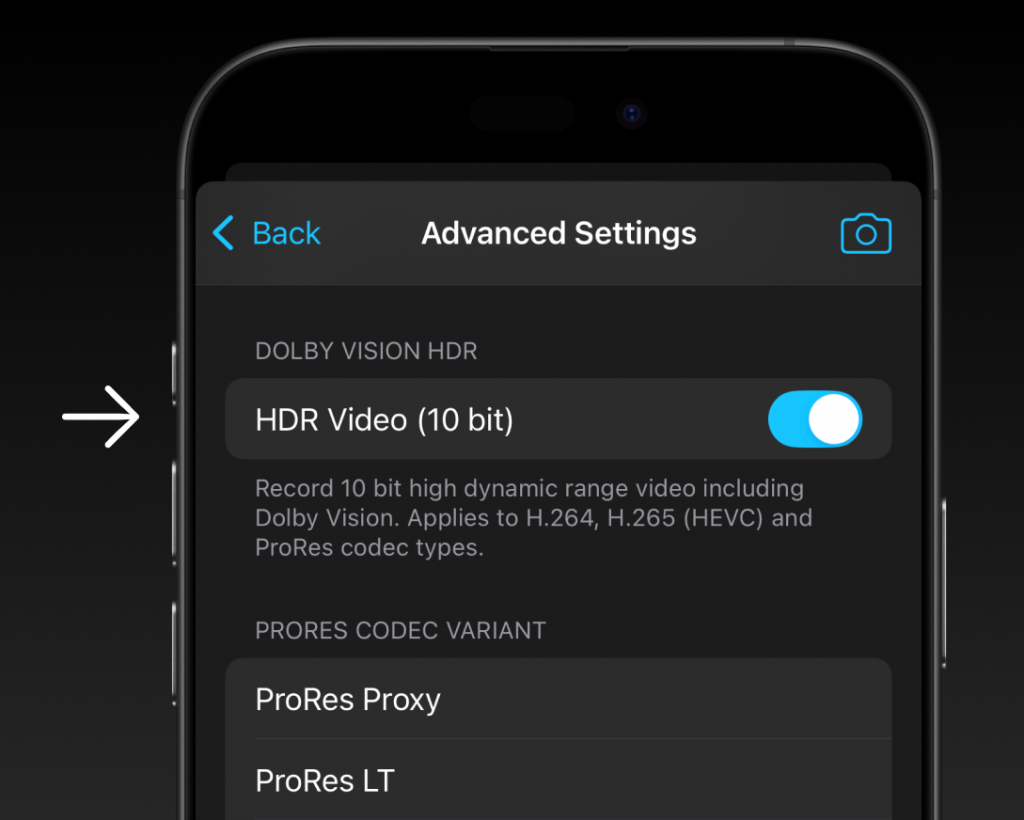
Make sure HDR Video is enabled in ProCamera before you start filming. It’s usually on by default, but it’s worth double-checking so you know exactly where the setting is when you need it. iPhone 12 and up can record in HDR.
- Install ProCamera: Download from the App Store
- Open ProCamera
- Tap Control Panel (9 dot icon) > Settings > Video Quality > Advanced Settings
- Make sure HDR Video (10 bit) is enabled
- Adjust additional settings if needed: Compression, ProRes Codec, or Log Profile
Importing HDR Video in Premiere Pro
To show off your beautiful HDR content, it’s important to get your settings right during the import, editing, and export process. One of the most common problems at this stage is that the footage may not even show up as HDR at all—either due to incorrect import settings, missing metadata, or an export format that strips away the HDR information. Whether you’re working with photos or videos, a few small missteps can lead to a big headache. But don’t worry—we’ll walk through the key steps to make sure your edits preserve the full HDR impact.
- Open Premiere Pro and create a new project
- Import your HDR footage
- Right-click to inspect your footage and ensure it is HDR (See Screenshot)
- Color Space should be Rec. 2100 HLG. If it’s Rec. 709, it is not HDR footage
- Create a new sequence (Drag and drop your footage into the Timeline)
- Ensure the working color space is set to Rec. 2100 HLG to align with the HDR format
Note: Premiere Pro does not display HDR correctly in the preview window during editing—colors may appear washed out or grey. The true HDR effect will only be visible after export.
Tip: To improve color accuracy while editing, temporarily switch the working color space to Rec. 709. Before exporting, be sure to switch it back to Rec. 2100 HLG to retain HDR in the final output.
Exporting HDR Video in Premiere Pro
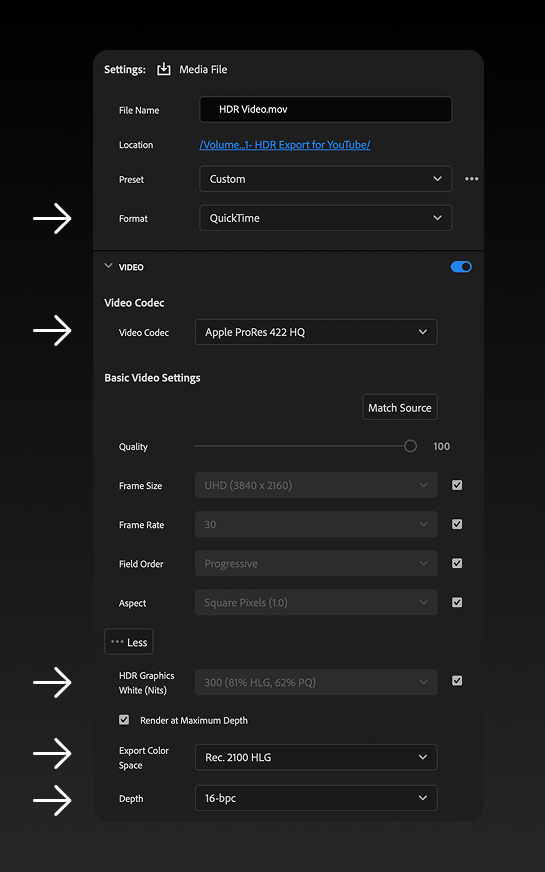
Make sure your export settings preserve the HDR information. Here’s what worked for us:
- Format: QuickTime
- Video Codec: Apple ProRes 422 HQ
- HDR Graphics White (Nits): 300
- Depth: 16-bpc
Now you’re ready to export your HDR video. Note: File sizes will be extremely large when exporting ProRes 422 HQ. To reduce the large file size while still preserving the HDR information, follow these steps:
- Open the file in QuickTime
- Select File > Export As > 4K
- Choose Smaller File Size (HEVC) in the dropdown menu
Save HDR Photos as HDR Video Clips directly in ProCamera
Making sure your photos display in full HDR like your video footage poses another challenge. Have you tried importing your HDR photos into Premiere, only to see them stripped of the HDR information and look flat compared to your beautiful HDR video footage? To ensure that your HDR photos are recognized as such inside Premiere Pro, you can save your photos as HDR Video Clips directly inside ProCamera to ensure that the HDR information is preserved when importing into Premiere Pro. This is especially useful if you don’t want to make major edits to your photo and need a quick solution. To do this simply:
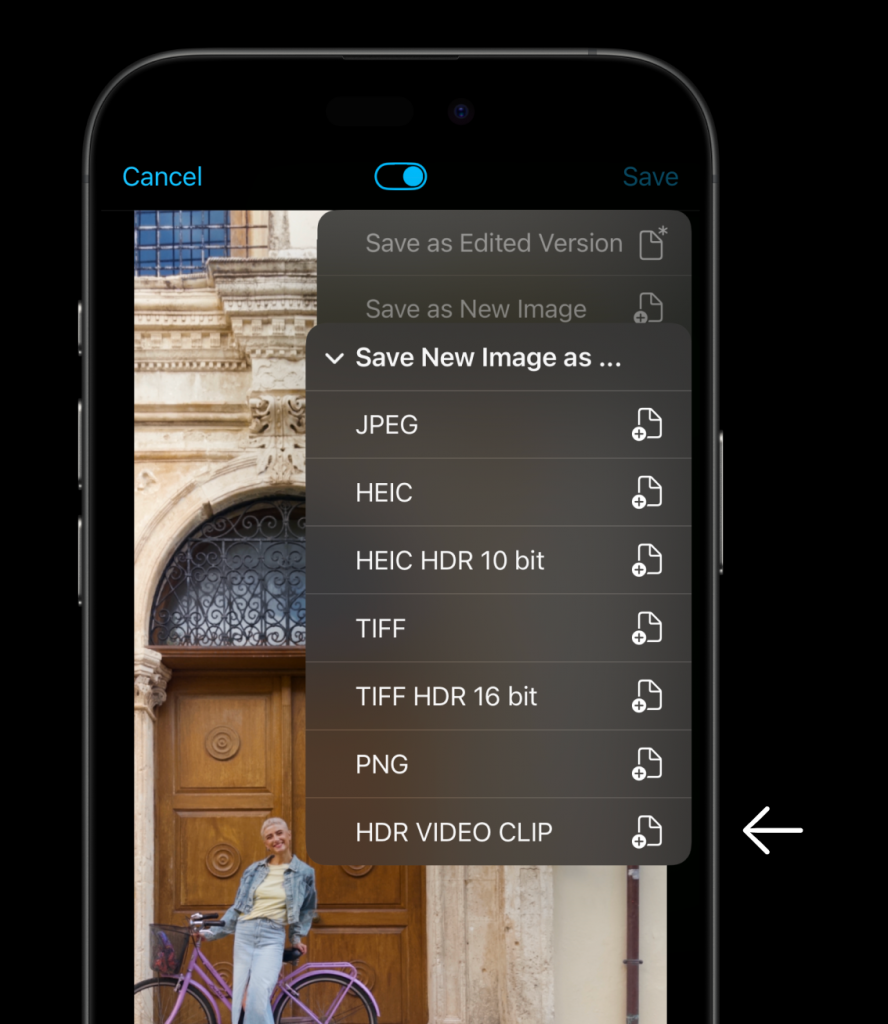
- Open your photo in the Editing Studio inside ProCamera
- Long press the Save button on the top right
- Select “Save New Image as …”
- Select HDR VIDEO CLIP
Now you can import this newly saved video clip into your HDR video project inside Premiere Pro for full compatibility. For more information about this, check out this video.
Editing and Exporting HDR Photos in Lightroom
To edit your photos with desktop class editing software, for instance in Lightroom, you’ll need to make sure you properly edit and export them so that your HDR information is preserved.
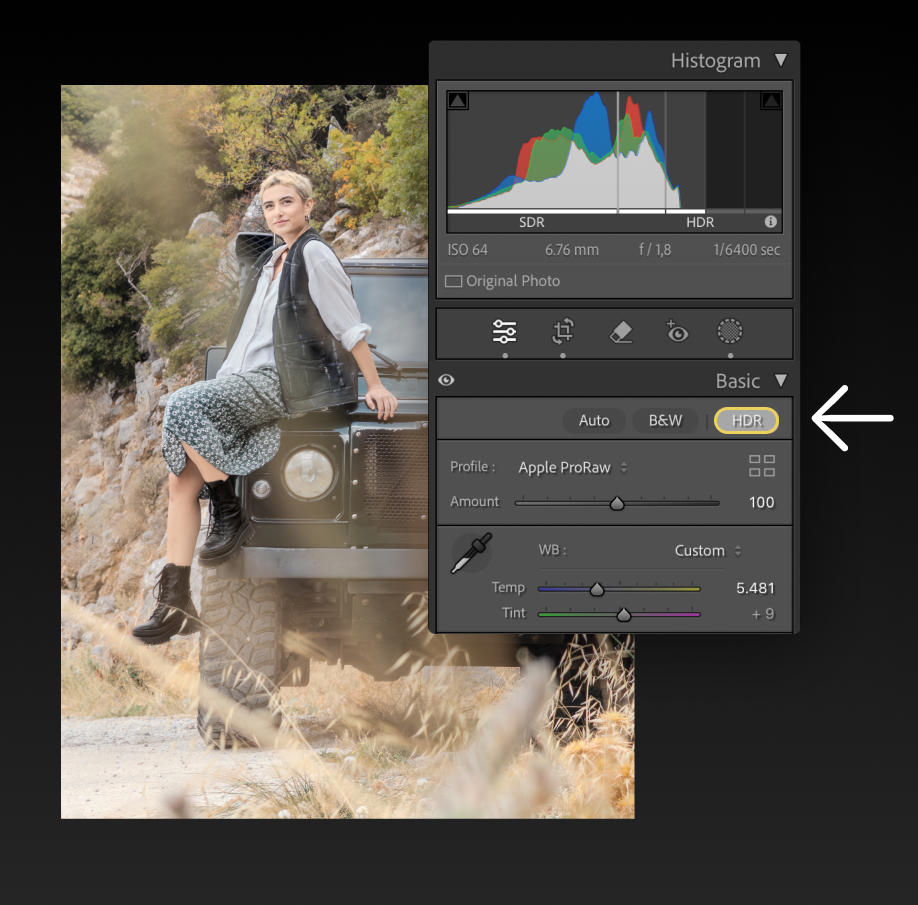
- Import your HDR images to Lightroom
- Activate “HDR” mode (see screenshot)
- Adjust exposure, contrast, and color settings
- Export in formats that support HDR: AVIF, JPEG XL, TIF (we used TIF)
Practical Tips for HDR Video Production
By following these steps and using the advanced features of iPhone 16, ProCamera, Adobe Premiere Pro, and Lightroom, you can create stunning HDR videos that stand out and captivate your audience. HDR is the future of visual content—support is growing and it makes your work stand out with unmatched clarity and dynamic range. Give it a try! Here are a few extra tips to keep in mind:
- Consistent Lighting: Ensure scenes are well-lit to fully benefit from HDR’s dynamic range
- Monitor Calibration: Use an HDR-capable monitor during editing
- Storage Considerations: Use high-capacity storage and backups
- Stay Updated: Keep apps and firmware updated
- Check HDR support on the platform you want to upload to
See our Latest Video Production in Full HDR!
If you’ve followed all the steps as outlined above, your video is ready to share with the world in its full HDR glory! Social Media platforms like YouTube will now recognize your video as HDR once uploaded. Keep in mind it might take a day or two for the video to finish processing and appear in HDR. So be patient! Be sure to check out our latest ProCamera video filmed entirely in HDR (with HDR photos too!) on the beautiful island of Crete.
